Welcome to Part Two (of two) of my journey to create a 3D printed action figure at home (see Part One HERE) With sculpting finished, we can proceed onto prepping the parts for print.

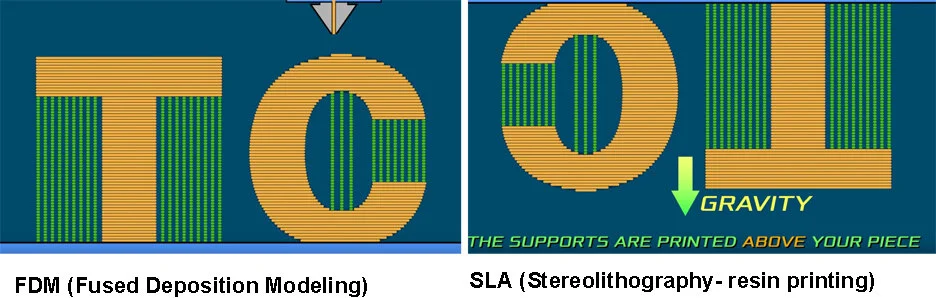
This is the free Chitubox slicing software, meaning it slices the parts into layers so the printer knows how to recreate the digital models in real space. For anyone unfamiliar with how resin printing works, liquid resin (looks like gray chocolate milk) is poured into a vat with a clear underside. A metal plate is lowered to the very bottom of the vat, where a laser shoots upward, selectively hardening the resin as per the slicing data, adhering it to the plate. The plate is then raised incrementally (in this case with a “step” of 0.03 mm) and the laser fires again, eventually adhering the new layer to the previous existing one rather than the plate. Layer by layer the forms are built up in this way.

Supports added
Orientation matters a lot, since we have to consider the most practical way for the parts to form (wouldn’t make sense to have a huge pyramid suspended by only the tip for example). Also, the top-facing side will turn out the best, while the bottom will have the most distortion or messiness. After positioning, supports are added. The bottoms of the stems (touching the “floor” in this view) will end up being the points of contact with the build plate itself, hanging upside down.

Each support is manually added, for the most part
Graphic from Nerdtronic (Youtube channel)
In a sense, resin printing is the opposite of Fused Deposition Modeling, which builds the forms by essentially melting molten plastic bits on top of each other, moving upward. For further explanation I recommend this Nerdtronic Youtube video, which uses cool motion graphics to illustrate this in a simple way.

It’s always a relief to see complete parts after a print
After a while, in this case about 2 hours, the print is done! Finally we can step away from the computer. The plate raises all the way up, and we’re left with what looks like our sculpted parts covered in goop.
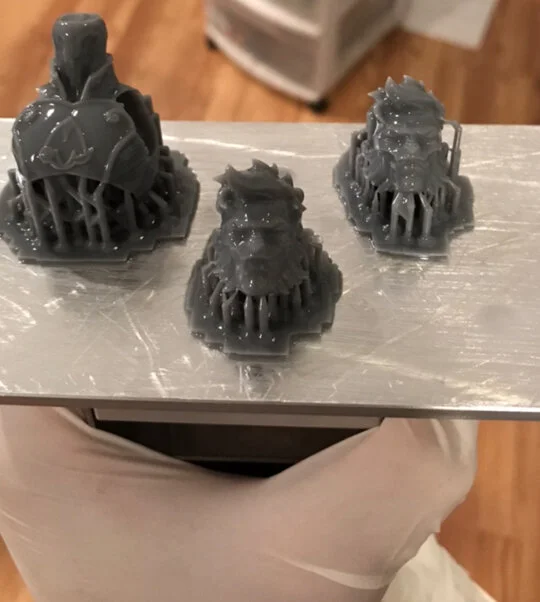
As you can see, there is a layer of resin slime that makes it hard to tell if the details have really come through or not. I rinse off with Simple Green cleaner, and if there are parts that really require precision, like interlocking connections or joints, I’ll put gloves on and manually clean those out with hand tools— don’t want all that planning to go to waste because leftover resin got clogged up.

Hanging out in the ultrasonic cleaner, then under the UV lamp
After preliminary cleaning, the parts head to the ultrasonic cleaner with isopropyl alcohol. There are water washable resins, but since you shouldn’t send the water-resin runoff down the drain anyway, I’ve felt they don’t reduce waste or cleanup time that much. I could be totally wrong though. After the alcohol bath, finally they’re ready to be cured. Living in California, there usually is ample direct sunlight to cure the resin, but the lamp is a good backup tool anyway. 3D print-specific UV machines exist, but my cheap one meant for nail polish works okay too.

Feels like a big hurdle cleared with everything printed
Since the maximum amount for one printing depends on the size of the build plate, getting all the parts done as pictured here took about seven batches. It was a pretty big relief to make it to this stage; probably the first time I felt closer to the end than to the beginning.

It’s very exciting to see cleaned parts with no (or few) errors!

Most of the parts turned out pretty good! However, the shoes and some fur sections lacked definition, so I went back and revised the sculpt in Zbrush. I’m glad I took the time to make those changes:

First round of prints (red) vs the adjusted versions (blue)

Had to make sure the shoes came out crisp
I have no photo for this stage, but the next stage is removing all the supports. I’ve heard of people calibrating their supports such that they basically come right off, but that hasn’t been my experience, and also I’d rather err on the side of more cleanup rather than more reprints. So a lot of cutting, sanding, spot retouching with putty… years of building plastic models really helps here.

Sprue removal and cleanup can be tedious. I first cut off from the base (images 1 + 2) so that when I clip the supports off (3), it’s less likely the connecting area will tear off causing damage in the process, though it still happens. I use a flat file and then 400 grit sandpaper (4 + 5), and at this point I can see if any areas need to be fixed up (6). In this case I know that area will be inside the shoulder socket and never be seen, but if it’s more visible I may need to resculpt entirely with putty. Step 7 shows the putty applied to the cratered areas, and after it’s dried I can then finish with higher grit sanding (8). Looks messy now, but after a bath to get rid of all the dust it should hopefully be ready for painting.

Back to the ultrasonic cleaner they go, this time just with water, a spritz of household cleaner, and dish soap.

At this stage feels like the hard part is over
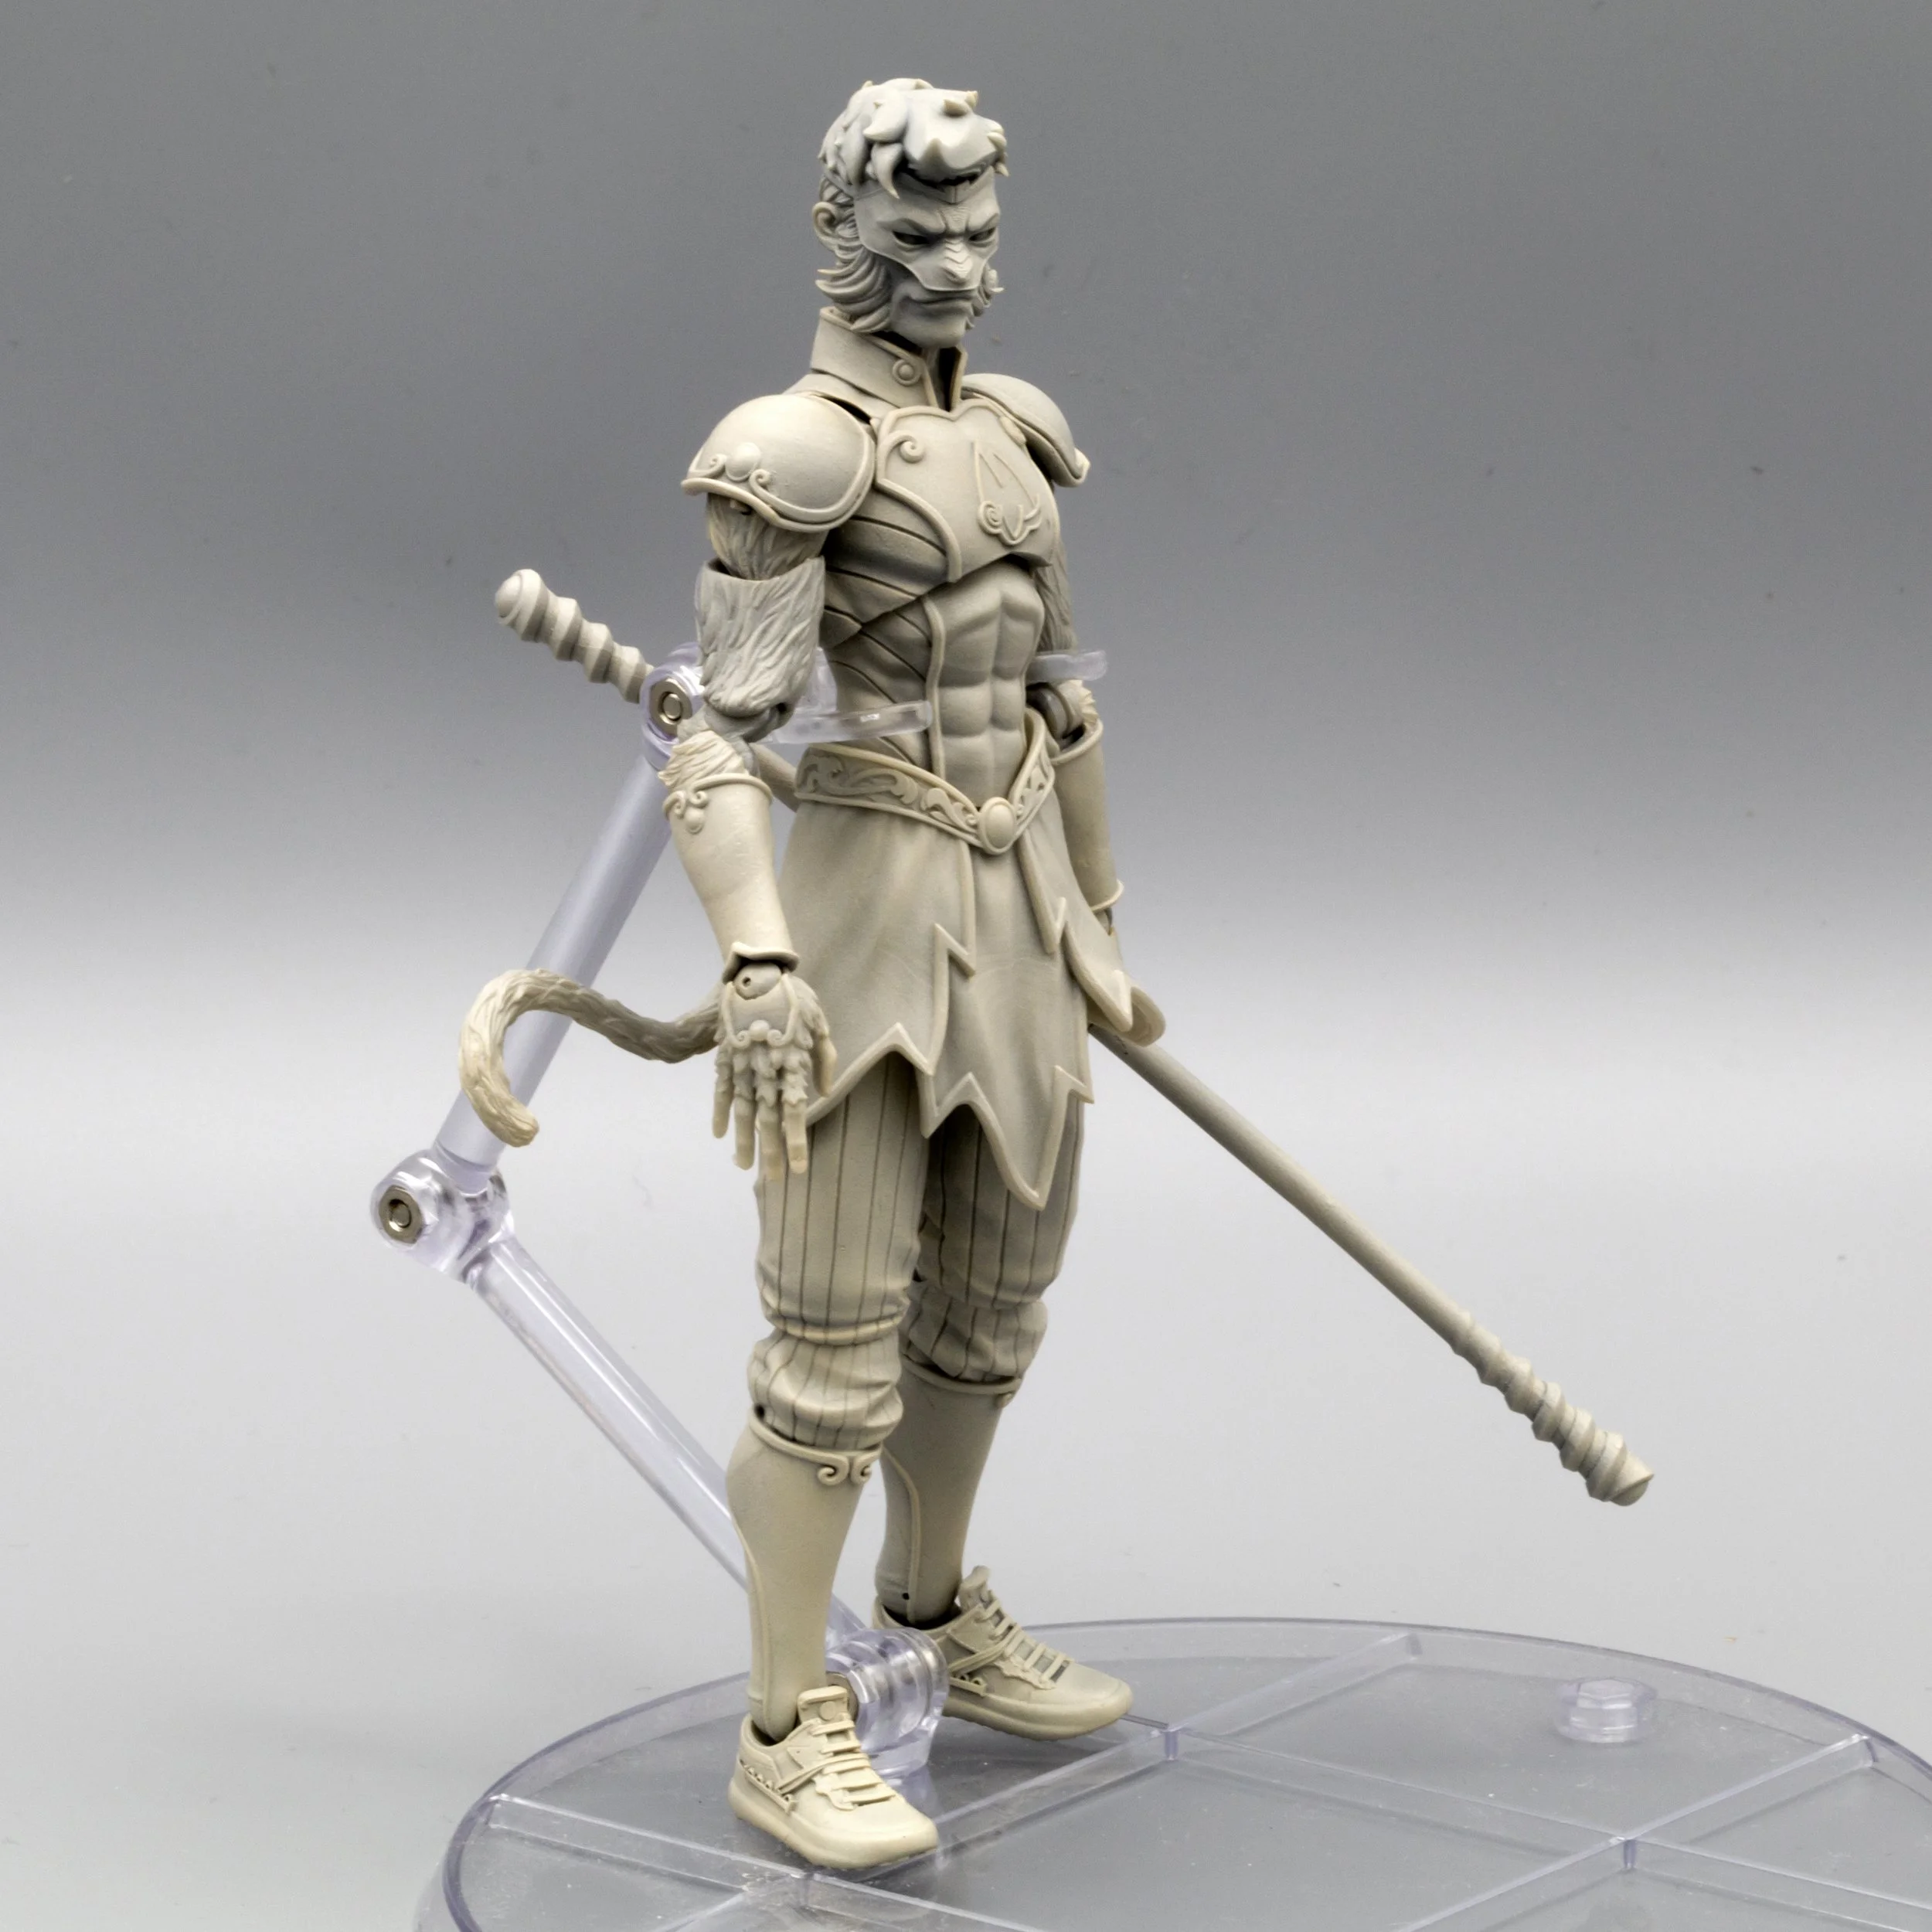
With the parts removed and cleaned, time to prep for painting. I use an airbrush to cover the larger areas, before finishing with brush painting.

Ready for airbrushing
I’ve mounted each part on a skewer with an alligator clip. If there’s no non-outward facing place to grip, I’ll rig something up (rolled up sandpaper, metal pin, etc) to make sure it’s secure while painting.

I WAS SO FIRED UP SEEING HOW THIS TURNED OUT. I THOUGHT, “MAYBE I SHOULD JUST STOP HERE???”
I ran out of my usual gray primer and ended up using this tan one instead. I was so happy at this stage! So exciting to see; it really felt like all the care and time I had put in was finally visible. I almost didn’t add color for fear of mucking things up, but I figured I’d always wonder how it would have turned out if I hadn’t.

Blue was the easiest
Airbrushing—specifically, the actual process of spraying atomized paint— is really satisfying. So applying the base, shade, and tints for the blue, red, and fur was fun.

Masking the mask
The next step, masking, is the opposite: takes forever, really easy to mess up, and the payoff doesn’t come until after the mask is removed. For weird non-geometric shapes like the above, I use poster tack, as it’s easy to find and not overly sticky (won’t lift paint off for the most part).

Airbrush stage complete. As you can see, the gold trim, shoe details, bare skin, and all face details have yet to be painted.
After painting and masking and painting repeatedly, it’s ready for hand painting. The green arrow in the photo above shows the original shade of red, which I wasn’t happy with. After getting frustrated I decided to sleep on it, and the next morning I was able to adjust the color to mesh better in hue and value to what I was hoping for. Since every step is so broken up, I find it can be hard to keep a palette cohesive, but it also allows for a kind of surprise element when finally seeing it all together for the first time. I would never say color is one of my strengths, but I do enjoy mixing paint and coming up with deliberate color schemes.

Model paints, and their corresponding oils that I’m used to
This is my base set of paints. Basically my entire foundation of color theory was formed in two semesters of school, and I got so used to those six oil paints that I always try recreate them no matter the acrylics I’m using. If I need something like a bright yellow I’ll add it in of course, but my default approach to paint mixing always starts something like this. Lahmian Medium, from Citadel/Games Workshop, is very useful for acrylics because it’s actually paint without any pigment, so you can dilute paints without losing its binding quality.

The palette is wax paper on a wet paper towel— a tip from miniatures painting I picked up that keeps the paint from drying out.

Mask painted
The masks sort of look like a single color… but actually have airbrushed highlights, then brush-painted shading and highlighting additionally.

I have to say I really like how these eyes turned out. With the eyes sculpted, all I had to do was apply slightly diluted paint, and the eyes’ contours (and gravity) took care of the rest.

Metallic… metallics?
I was pretty happy with how these gold highlights turned out. Those are painted lights and darks, not shadows. Of course it clashes with the flatter areas on the rest of the figure, but still I thought a nice moment.

Almost done! Can still see the build lines slightly when zoomed in close like this
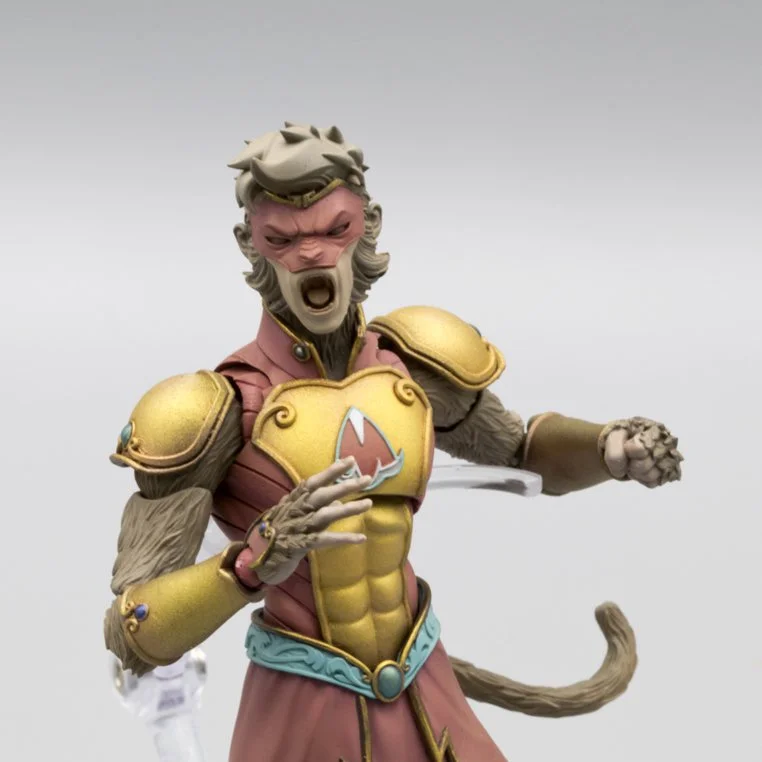
The very last area I painted… the chest emblem. I messed up and forgot to mask off the painted red “M” when I sprayed the chest armor, so I ended up having to hand paint it. This is actually the only area where I used wet-on-wet blending, so the top of the “M” would be lighter than the bottom, and thankfully it turned out okay. Really grateful for that mini painting practice I had a while ago! The thumb-as-test-surface thing is also something I picked up from minis.

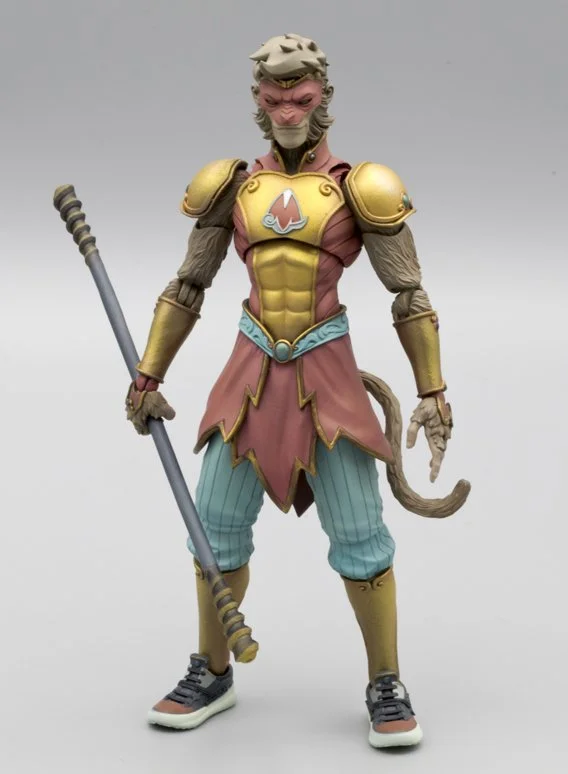
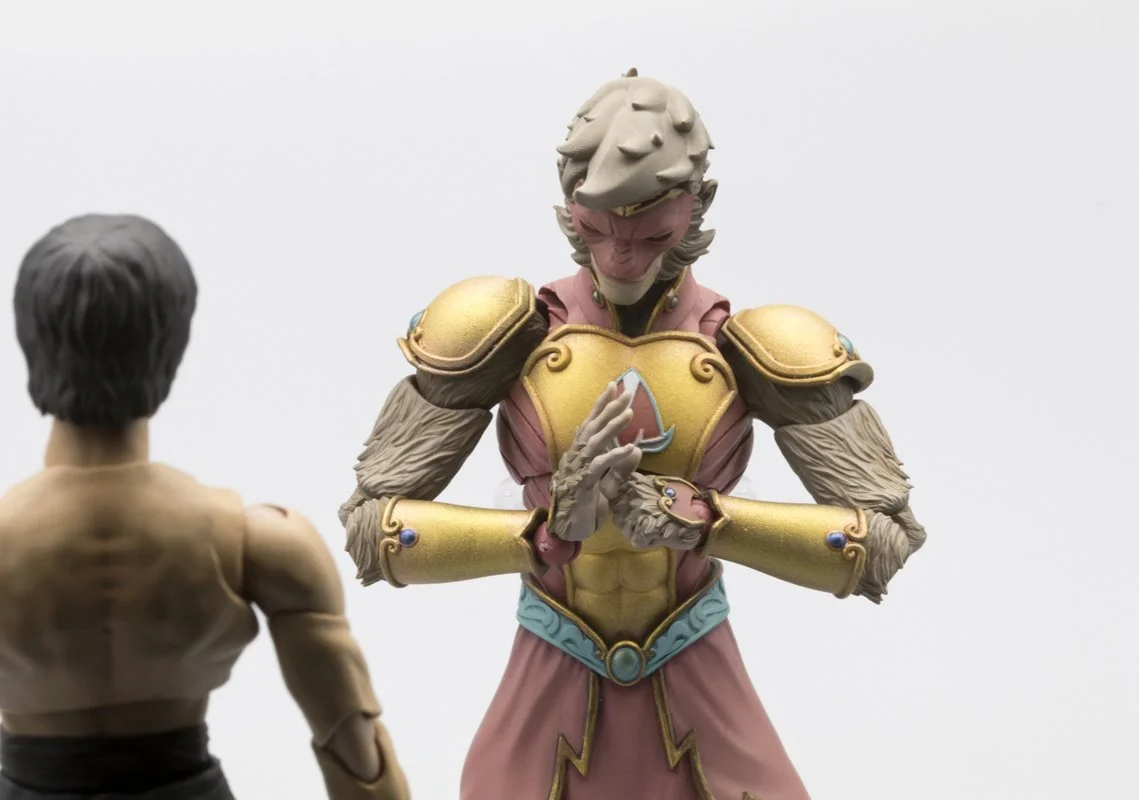
DONE!
And there you have it, a complete figure made at home. Of course I still had to photograph him, but I’m pretty novice at that and there are tons of better resources out there, so the only thing I’ll say is that I can’t believe the generation of toy sculptors before me used to take photos of original wax sculpts held in place with just paraffin in the joints. This is plastic, and even with most joints pinned with dowels it was a pretty scary taking photos while trying to keep him upright. A very nerve-wracking shot with no support stand:


To close, thanks for reading all the way through. This project has made me rethink what sort of personal projects I thought were possible, and I’m grateful I could begin this undertaking with a character whose very existence is significant to a lot of people including myself.
